Monthly Archives: August 2017

Mystery solved….what to do with leftover spaghetti noodles

Standard
Mystery solved….what to do with leftover spaghetti noodles

In a very random conversation last week at work, my friend shared that she had made a frittata with leftover spaghetti (no sauce, mind you).  I replied “I always make too much and throw it out”.  Laura is with us today to share a super easy, economical and delicious  way to use that leftover spaghetti (who doesn’t cook too much)???

STAFF_BirrellL-WEB

Meet Laura

She found that this frittata is a great way to use up left-over spaghetti, and her family of three ate the whole thing and asked for it again the next night.  I plan to try it soon, but I think I’ll have to mix it up with a few different meats cuz I live with Mr. All Meat Pizza – you could use browned sausage, canadian bacon, ham, etc.  If you do try one of these alternatives to the bacon that Laura used, we would love for you to come back and comment below!

Step 1 involves chopping up the cooked spaghetti:

frittata2.jpg

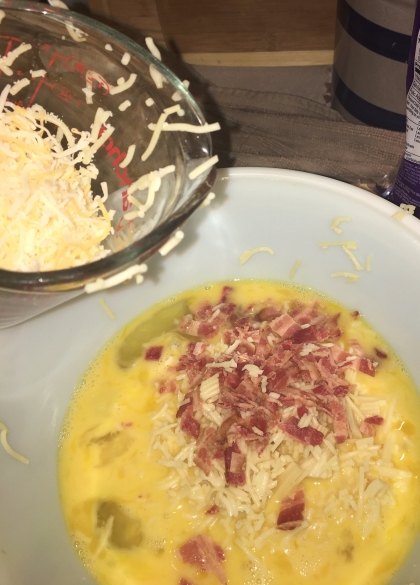
Step 2 – whisk the eggs and milk, and adding the yummy (bacon and cheese) ingredients:

frittata4.jpg

frittata5.jpg

The Final Frittata!

I could most definitely snarf a piece of that right now!  I’m sharing Laura’s recipe below, and hope that you enjoy as I certainly plan to!  Thanks for dropping by to get in on Laura’s quick weeknight meal!

~Connie Kaye

Spaghetti Frittata

  • Print
Ingredients:

6 eggs
1 ½ cups cut-up cooked spaghetti
2 slices of chopped cooked bacon
1 cup of shredded cheese
Salt and Pepper to taste

Preheat the oven to 350.  Spray a 9 inch round pie plate with non-stick cooking oil.

Whisk the six eggs in a separate bowl. Add salt and pepper to taste. Laura added a Zesty no-salt substitute to give it a little more flavor without adding additional salt.

Stir in the 2 slices of pre-cooked bacon, ½ cup of shredded cheese and chopped spaghetti. (Laura used the Mexican four cheese blend because that is what she had on hand and wanted to use up.)

Pour the blended items into the pie plate and sprinkle with the remaining ½ cup of cheese.  Bake for 30 min. or until center is set.

Thought we would try our hand at canning…..Peach Hot-Pepper Jam

Standard
Thought we would try our hand at canning…..Peach Hot-Pepper Jam

Found this delicious recipe for Peach-Hot Pepper Jam in the Kraft Food & Family FREE magazine and it’s been a hit with many friends.  (I’ve actually had friends trade me stuff for it)  While the name implies that it’s hot, it’s not!!!  Just delicious.  We have used it on sandwiches, but the most popular way to consume it is to put it over softened cream cheese and dip with your favorite dipping instrument, such as Snack Factory Pretzel Crisps.    We use the original pretzel flavor with this yummy appetizer/snack, but we snarfed up a bag of the sea salt & black pepper yesterday which were delicious.   As rookies to the canning process, we learned on our first batch which wouldn’t set up – make sure the peaches aren’t too juicy, or add more pectin to adjust for the extra liquid.  While the peaches are plentiful, we plan to make more for gifts.  Hope you enjoy as we and our friends have!

~Connie Kaye

Peach Hot-Pepper Jam

  • Print
Ingredients:

  • 2 cups finely chopped peeled peaches (about 1-1/2 lb.)
  • 1 cup finely chopped red peppers (about 1 large red pepper)
  • 1 cup finely chopped jalapeño peppers
  • 1 cup HEINZ Apple Cider Vinegar
  • 1 pkg. SURE-JELL Fruit Pectin
  • 1/2 tsp. butter or margarine
    5 cups sugar, measured into separate bowl
    Wash jars and screw bands in hot soapy water. Rinse well. Place jars, right sides up, on rack in bottom of boiling-water canner. Fill canner with enough warm water so it covers tops of jars by at least 1 inch. Bring water to boil; boil jars 10 min. Reduce heat to simmer. Leave jars in hot water until ready to be filled.
    Place new lids in medium saucepan filled with water; bring water to boil. Turn off heat. Let lids stand in water until ready to be used.


Place peaches and peppers in 6- or 8-qt. saucepot. Add vinegar. Stir in pectin. Add butter to reduce foaming. Bring mixture to full rolling boil (a boil that doesn’t stop bubbling when stirred) on high heat, stirring constantly.


Stir in sugar. Return to full rolling boil and boil exactly 1 min., stirring constantly. Remove from heat. Skim off any foam with metal spoon.


Remove jars from water; drain well. Immediately ladle fruit mixture into prepared jars, filling to within 1/4 inch of tops. Wipe jar rims and threads. Cover with 2-piece lids. Screw bands tightly. Place jars on rack, then lower into canner. (Water must cover jars by 1 to 2 inches. Add boiling water, if necessary.) Cover canner; bring water to gentle boil. Process 10 min. Remove jars and place upright on towel to cool completely. After jars cool, check seals by pressing centers of lids with finger. (If lids spring back, lids are not sealed and refrigeration is necessary.)

While the berries are fresh…..

Standard
While the berries are fresh…..

try this cheesecake on for size!  I made it to celebrate a colleague’s completion of her master’s degree, and it was a huge hit.  Turns out the toughest thing about it is not gobbling up the berries as you are making the cheesecake – they are sooo delicious now!

A pic of this delish final product:

cheesecake

As we were snarfing it up, she mentioned being able to now just read a magazine, surf the web, and watch TV, instead of homework.  Man, I remember how great that feeling was!  So Charmine, here’s to you – enjoy and congrats again!

~Connie Kaye

Red, White & Blue Cheesecake Bars

  • Print
Ingredients:

Ingredients:
2 pkg crisp, sweet cookies (such as Pepperidge Farm Boardeaux)
1/4 cup salted butter, melted

1 cup each fresh or frozen raspberries and blueberries
3/4 cup plus 2 tsp granulated sugar, divided
2 tbsp water, divided

3 (8 oz) pkg cream cheese, softened
1/4 sp salt
2 lg. egg whites
1 lg. egg
1/4 cup sour cream
2 tbsp flour
2 tsp fresh lemon juice (1 lemon)
2 tsp vanilla extract

Puttin’ the party together:

Preheat oven to 350.  Process cookies in a food processor until finely ground, then drizzle melted butter over cookie crumbs; pulse well a couple of times to mix.  Press crumb mixture into bottom of lightly greased 9 x 13 baking dish. Bake about 10 minutes, until lightly browned.  Cool completely, about 30 minutes.  Reduce oven temp to 325.

Meanwhile, combine raspberries and 2 tablespoon each of the sugar and water in a small saucepan over medium heat.  Bring to a boil, stirring frequently to mash raspberries, until thickened, about 6-8 minutes.  Place raspberry mixture in a fire wire-mesh strainer over a bowl; press mixture until there are about 3 tbsp. raspberry puree in bowl.  Discard solids in strainer.  Cool puree completely.  Repeat exact process with blueberries.

Beat softened cream cheese, salt, and remaining 3/4 cup sugar with an electric mixer on medium speed until smooth.  Add egg whites and egg, 1 at a time, beating well after each addition.  Add sour cream, flour, lemon juice, and vanilla, and beat at low speed until smooth.  Pour batter into prepared baking dish; smooth top.

Drop level teaspoons of raspberry and blueberry purees all over the top of batter; gently swirl with a knife.

Bake at 325 until cheesecake is almost set (center will still be a little jiggly when dish is touched), 25 to 28 minutes.  Run a knife around edge of cheesecake to loosen, and cool on wire rack 1 hour.  Cover and chill 4 hours or overnight.  Cut into bars and dive into deliciousness!